


Scope of Work: Injection of polyurethane chemical grout through probes to rehabilitate and seal below-grade pipes from an exterior application.
Problem: Defects and joints in below-grade pipes allow for the infiltration of water into the pipe. This migration of water through defects that typically occur in pipe joints can cause an array of problems for the soil substrate and above-grade structures such as roadways, sidewalks, bridges and buildings. Access to the pipe is often limited and the rehabilitation or repair process often requires shutting down roadways, excavation and other time consuming options.
Solution: Injecting chemical grouts from outside the pipe is faster, cheaper and less disruptive than excavation and replacement.
Steps:
IDENTIFY THE DEFECTS
Identifying where the infiltration is occurring is the most important step in a successful rehabilitation application from outside the pipe. In scenarios where the pipe is large enough to access by crew, the identification process can be simple. Entry into the pipe along with a detailed log and measurement of location and the type of leaks present is required. If access by crew is not applicable, secondary techniques will be necessary to identify defects and their location. Video or CCTV can be taken from the interior of the pipe in order to locate and identify defects / leaks. GPR (ground penetrating radar) may also be used as a supplemental tool for locating voids, leaks and defects.
INJECTION PROBE PREPARATION
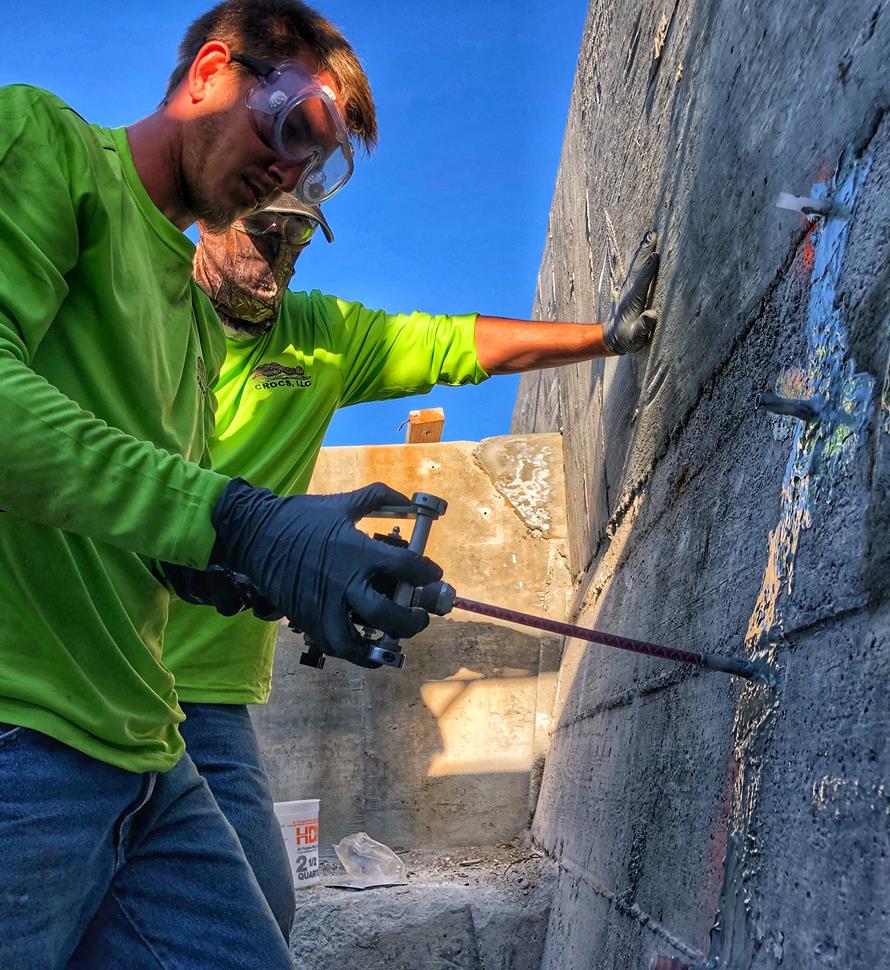
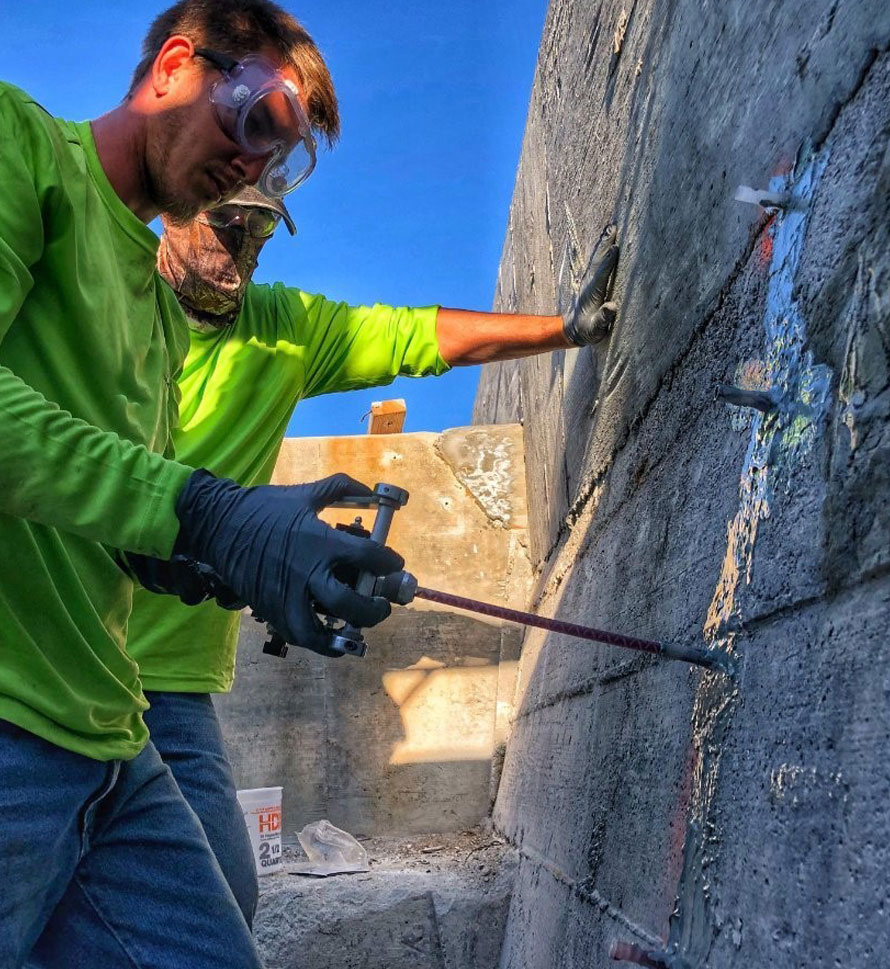
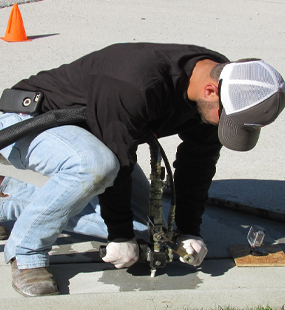
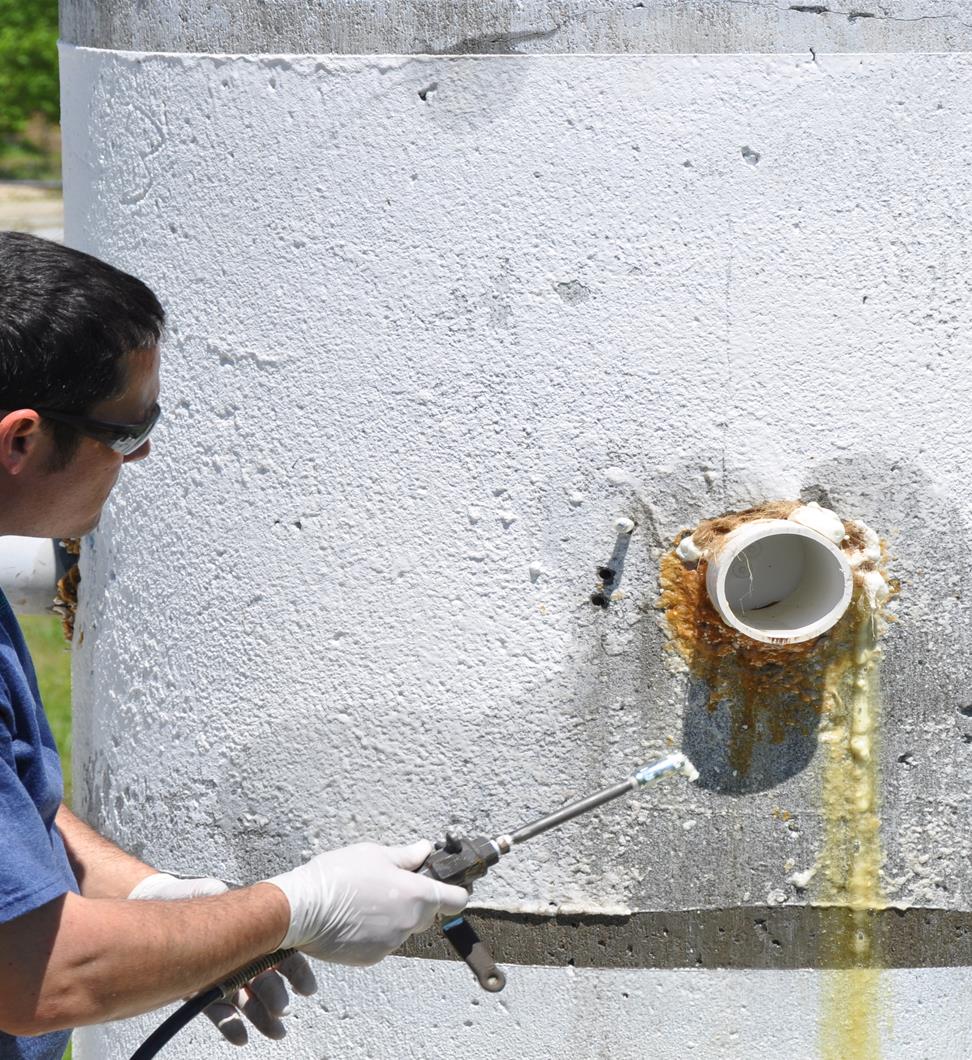
Once defects / leaks have been identified, probes can be installed to precise locations for the injection of Prime Resins chemical grout. For shallow depths, probes may be as small as 3/8” in diameter. For instances of greater depth or harder, more dense substrates, 1/2” to 3/4” probes may be necessary to effectively drive probes to the defect location.
Probes should be installed to a distance of approximately 6” – 12” from the defect in the pipe. Prime Resins recommends using drive points when installing probes to inhibit soil from blocking the end of the probe. When probes have been installed to depth, lift pipes 1” – 2” to allow for the release of the drive point. This will allow Prime Flex chemical grout to flow freely into the substrate.
PREPARING PRIME FLEX CHEMICAL GROUT
Both Prime Resins hydrophilic and hydrophobic chemical grouts may be used in probe grouting from outside a pipe defect. When using a Prime Flex hydrophilic grout (900 XLV, Hydro Gel SX), the material can be injected directly from its original packaging with a single-component pump. For hydrophobic grouts (910 and 920), a catalyst must be thoroughly mixed into the resin with a rotary drill and paddle mixer. Prime Resins recommends using a minimum 5% by volume amount of catalyst when sealing leaks outside a pipe.
INJECTING CHEMICAL GROUT
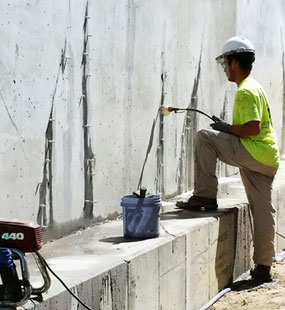
- Prime the pumping equipment with Prime Flex chemical grout to begin injecting material.
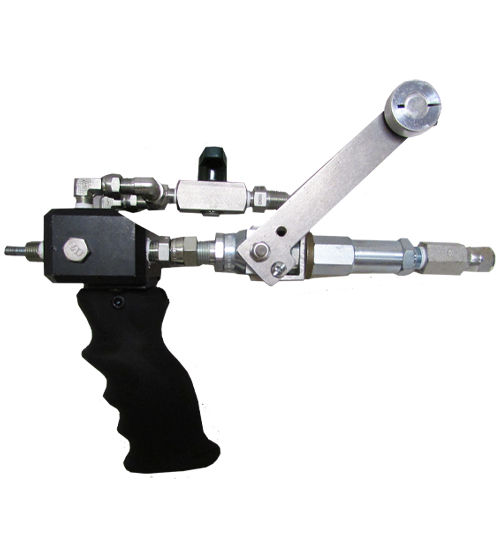
- Attach a Prime Resins flow control valve to the end of the injection probe, slowly open valve and begin pumping resin through probe into the area of defect.
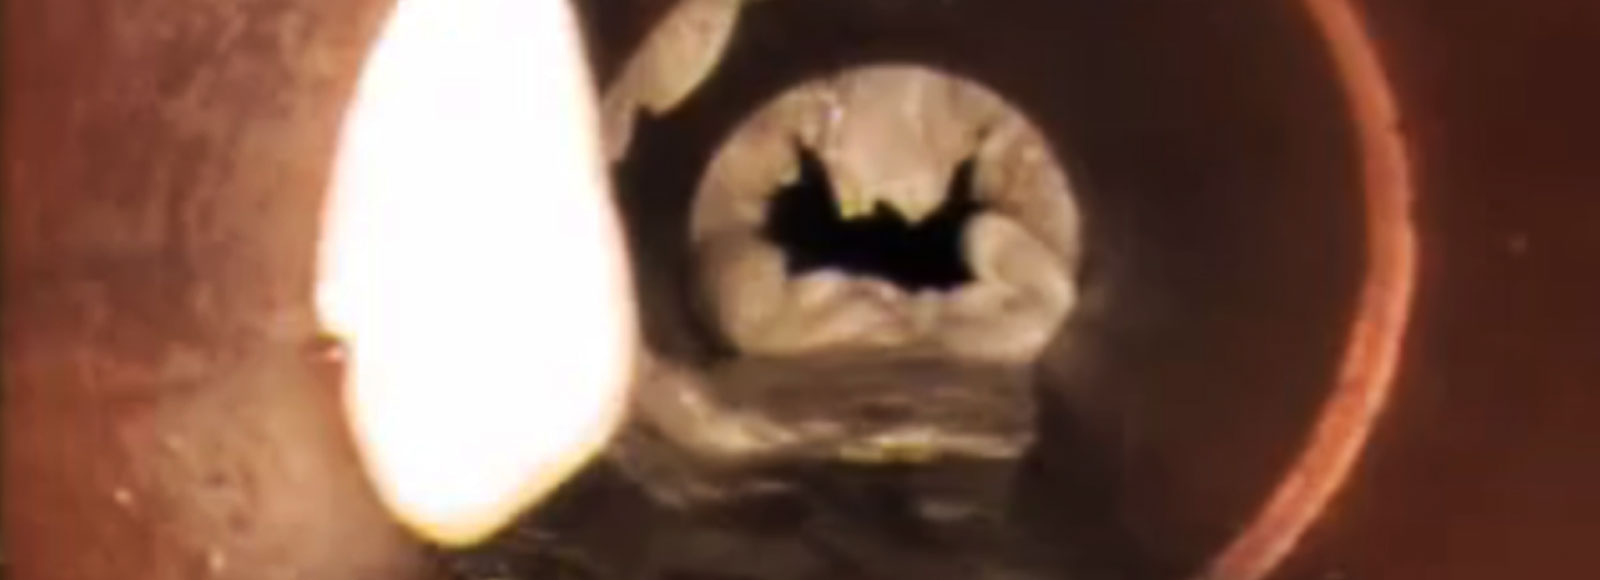
- During the injection of material, monitoring from the interior of the pipe should be performed in order to ensure grout is traveling through the defect, creating the necessary seal. We recommend using CCTV or similar for monitoring.
- Once Prime Flex chemical grout is confirmed in the defect location, close the valve and allow the grout to fully react.
- Continue pumping material as necessary to create a seal around the pipe. It may be necessary to lift the probe from the bottom of the pipe to the top on either side of the pipe in order to get a complete seal around the defect or joint.
POST INJECTION
- Once the successful injection application has been complete, close valve and turn off pumping equipment.
- Disconnect valve(s) from probes and then flush pumping equipment with Prime Flex ECO Flush (see Flushing a Single-Component Pump).
- Injection probes may then be removed or in some cases may be left in the ground and cut off below grade. Project owners can determine what is necessary.
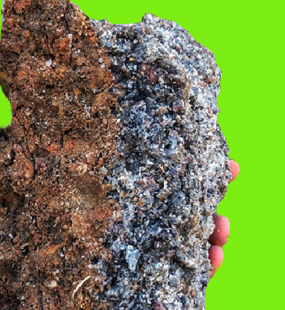
- Excess foam on the interior of the pipe can be trimmed flush with an ordinary hydro or mechanical root cutter.
Safety Considerations:
- Carefully read MSDS/SDS prior to handling any chemical.
- Always wear safety goggles when drilling, grinding, flushing, injecting or handling resins.
- Always wear protective clothing, chemical resistant gloves and safety goggles at all times when handling resins. Blowouts can occur when injecting resins at high pressure.
- Be aware of potential electrocution hazards when working with power equipment in wet environments. Keep water away from electrical cords and electrical equipment.
- Make sure no loose clothing can come into contact with moving mechanical equipment.
- Follow all OSHA confined space entry requirements where applicable.
- Keep first aid kit (eye wash, bandages, etc.) present on site with easy access.
Materials List:
- Prime Flex chemical grouts
- Prime Kat (for hydrophobic)
- Prime Flex ECO Flush
- Water
- Rags
- 5-gallon pails (3)
- Injection probes (schedule 40 or 80 iron pipe)
- Prime Resins flow control valve
- Prime Resins drive points
- JIC adapters to connect to pipe
Equipment List:
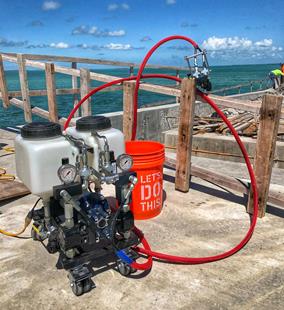
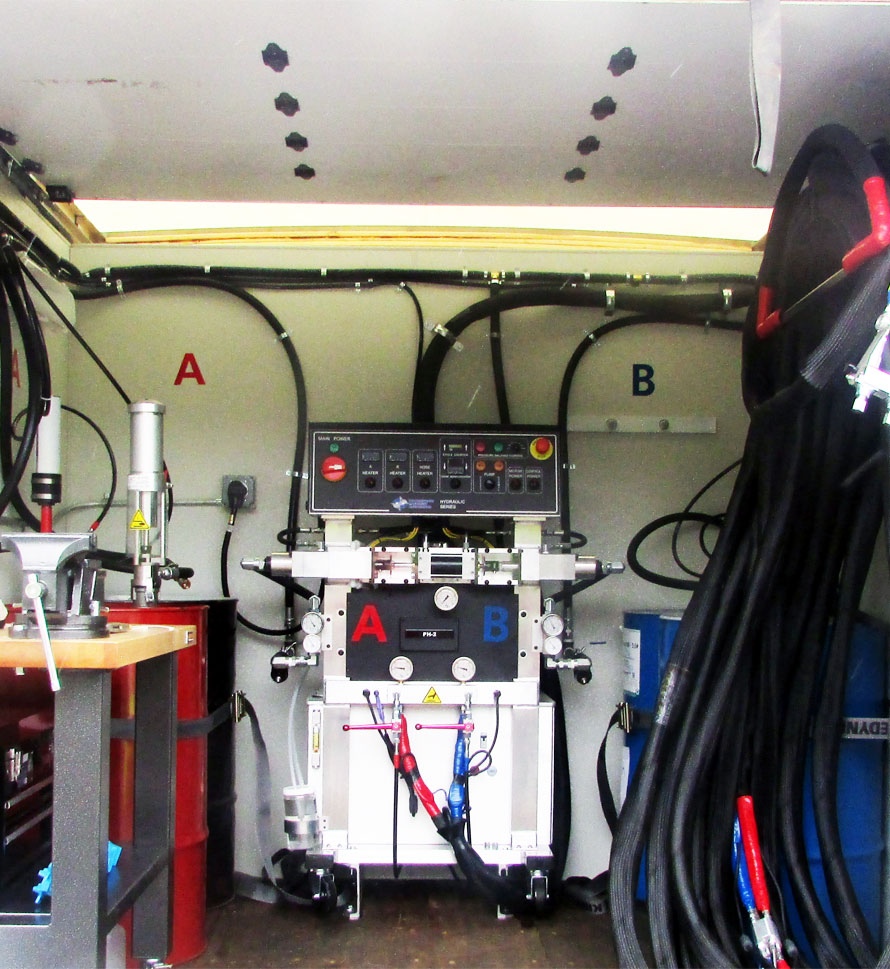
Pump
Rotary drill
Hammer (for driving probes)
Rhino or equivalent pneumatic hammer (for driving probes)
Paddle Mixer
Related: