


Scope of Work: Repairing damaged warehouse, manufacturing, commercial floors.
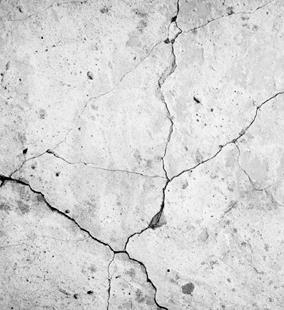
Problem: Damaged and unrepaired floors can cause harm to equipment, products and add to worker fatigue. They also reduce the value of the building and can lead to more costly repairs later. A fast setting material is preferred to get a floor back into service providing minimal interruption to the tenant. Cooler and freezer buildings will require the use of a fast setting material.
Steps:
Surface Preparation
- Mark out area to be repaired.
- Remove damaged concrete, dirt and debris from repair area. Clean, sound concrete is critical for a successful repair.
- Saw cut all perimeter edges to vertical, do not use “v” blades. Minimum edge (perimeter) patch thickness is 1/4” – do not feather edge repair material.
- Use chipping hammer to somewhat level floor or bottom of patch.
- Use vacuum to remove all dust from demolition.
- If rebar or wire mesh is encountered, clean steel and remove concrete by minimum of 1/4” to allow repair mortar to get underneath.
Application
- Once clean, sound and dry, prime repair area with neat mixed resin: mix small amount of component “A” and “B” and coat all surfaces within repair with paintbrush.
- Once primer has been applied, mix up additional resin and hardener based on area to be repaired. Mix with low speed drill and jiffy mixer for 20 – 30 seconds in a clean, dry pail.
- Quickly add up to 2 to 2.5 parts by volume oven-dried sand and mix for 30 – 45 seconds leaving no dry sand pockets.
- Once mixed you have 2-3 minutes to get mortar where you want it.
- Quickly place material into spalled area and trowel smooth with surrounding floor. Do not overwork – place it, level it, leave it alone. It will turn gray as it hardens.
NOTE: Floor Fix is moisture-sensitive. If concrete or sand is wet, it will make the mortar swell. If this occurs, wait 10 – 15 minutes and grind cured mortar back flush with surrounding concrete.
Safety Considerations:
- Carefully read SDS prior to handling any chemical.
- Always wear safety goggles when drilling, grinding, flushing, injecting or handling resins.
- Always wear protective clothing, chemical resistant gloves and safety goggles at all times when handling resins.
- Make sure no loose clothing can come into contact with moving mechanical equipment.
- Keep first aid kit (eye wash, bandages, etc.) present on site with easy access.
Materials List:
- Floor Fix
2. Oven-dried silica sand
3. Cleaning solvent for tools
4. Disposable paintbrushes for primer coat
5. Plastic sheeting (to protect floors in mixing area) - Several clean dry pails for mixing
7. Trowels
8. Rags
9. Gloves
10. Wooden paint sticks (for mixing primer)
11. Small plastic mixing container/cup (for mixing primer in)
Equipment List:
Concrete saw (preferably dustless)
Grinder with diamond blade or chipping hammer with chisel bit (preferably dustless)
Electric cords
Shop vac
1⁄2 – 3⁄4 hp drill
Jiffy type mixing paddle